In this assignment I had to think about when I decided to become a teacher. Growing up, my Mom was a teacher, so teaching was already a part of my life from middle school on. It wasn't until high school that I really decided that I, too, would enjoy being a teacher. Working with younger students and helping others always interested me and made me happy, but it wasn't until I had the opportunity to actually experience the classroom from an adult perspective that I knew I would end up in the classroom.
To create this project, I pulled out artifacts from my high school experience and put them together to create a video. I shot the pictures using the Photo app and curated all the pictures in iMovie. I also used the voice-over feature in iMovie to include audio. The Ken Burns affects aren't my favorite, but they do give a little interesting twist here and there.
I originally thought I would record my voice in the audioboom app, then upload this audio file and the pictures to my computer so that I could use MovieMaker to put it all together. In doing so, I had to also use Audacity to convert the .mp3 video files to .wav files so Movie Maker could read it. Also I had to log onto Audioboom from my computer to download the audio files. This was becoming too much work. Instead, I opened iMovie on my phone and got to work curating the pieces through the app. This was much less time consuming as I didn't need to send the files to myself via email.
In the end I learned that if I use my cell phone to create parts of a project, I should also finish the project on my cell phone. It's much easier then dealing with uploading, downloading, and converting the files. The viewer will need to turn their volume up because of how I recorded the voice over.
Sunday, February 12, 2017

(u04a1) Mobiles in the Classroom Interview
For this assignment I reached out to a fellow technology teacher in a different district who is 1:1 with iPads. This teacher, Katie, works at the middle school level with 5th-8th graders. This is the 5th year her middle school has supplied iPads to the students.
What are the biggest challenges you face on a daily basis?
Katie says keeping students on task during down times in the classroom can be the biggest challenge. Though many of the social apps are blocked, students can still access YouTube.
How do you deal with these challenges?
Students in this middle school sign an AUP, as does the parents of the students. This means there is a step-by-step process in place for any student who is misusing the iPad, taking off profiles, or damaging the device. At the beginning of the year, the district hosts an informational session that parents must attend regarding their student's device. Here, they explain how teachers monitor the iPads, what happens if the iPad is broken, and what we do with infractions due to misuse. For example, she takes away iPads for a week if students are misusing their iPad or removing profiles. They want parents to understand the expectations ahead of time. They also have students take an iPad class before receiving their iPad. They explain the same information that she did to the parents and also teach students how to use their iPads.
To keep students on task, Katie's district employs a student profile management system that does not allow students to add apps or update them. If an app is deleted, Katie knows because certain profile-related issues pop up.
When it comes to financing a 1:1 environment, what have needed to spend money on that you didn't necessarily need to before going 1:1?
Katie explained the district now spends money on apps, broken iPads, extra iPads for borrowing when an iPad is broken, iPad covers, wages for summer work to prepare the iPads and a student profile management system. There is money needed to run the 1:1 environment, something some districts do not consider when implementing 1:1 devices.
What kind of parent involvement have you seen?
As was stated earlier, the district has parents take a class at the beginning of the year, especially for any parents of incoming 5th graders, to attend. This aids parents in understanding how the iPads will be used for and the expectations the district has for the students. She tells the parents up-front that when an iPad breaks, it is the family's responsibility to pay the bill. The district will send the iPad in for repair and provide a student with a loaner, but the parent must foot the bill. Because of this, parents do emphasize to their children that taking care of the iPad is extremely important.
What advice would you give district looking into going 1:1?
At Katie's district, they have had various other districts visit during the day to see the iPads in action. Teachers ask questions of students and teachers as well as administrators. So, Katie says, do your homework. She states found out how many money it takes to not only start-up the 1:1, but also how much money it takes to maintain the environment. Think about how you will provide teachers with professional development opportunities that increase use of the device is another thought Katie had. Lastly, make sure that not only students, but parents, are also on board. Without their agreement there will be lots of uphill battles, she explains.
What are the biggest challenges you face on a daily basis?
Katie says keeping students on task during down times in the classroom can be the biggest challenge. Though many of the social apps are blocked, students can still access YouTube.
How do you deal with these challenges?
Students in this middle school sign an AUP, as does the parents of the students. This means there is a step-by-step process in place for any student who is misusing the iPad, taking off profiles, or damaging the device. At the beginning of the year, the district hosts an informational session that parents must attend regarding their student's device. Here, they explain how teachers monitor the iPads, what happens if the iPad is broken, and what we do with infractions due to misuse. For example, she takes away iPads for a week if students are misusing their iPad or removing profiles. They want parents to understand the expectations ahead of time. They also have students take an iPad class before receiving their iPad. They explain the same information that she did to the parents and also teach students how to use their iPads.
To keep students on task, Katie's district employs a student profile management system that does not allow students to add apps or update them. If an app is deleted, Katie knows because certain profile-related issues pop up.
When it comes to financing a 1:1 environment, what have needed to spend money on that you didn't necessarily need to before going 1:1?
Katie explained the district now spends money on apps, broken iPads, extra iPads for borrowing when an iPad is broken, iPad covers, wages for summer work to prepare the iPads and a student profile management system. There is money needed to run the 1:1 environment, something some districts do not consider when implementing 1:1 devices.
What kind of parent involvement have you seen?
As was stated earlier, the district has parents take a class at the beginning of the year, especially for any parents of incoming 5th graders, to attend. This aids parents in understanding how the iPads will be used for and the expectations the district has for the students. She tells the parents up-front that when an iPad breaks, it is the family's responsibility to pay the bill. The district will send the iPad in for repair and provide a student with a loaner, but the parent must foot the bill. Because of this, parents do emphasize to their children that taking care of the iPad is extremely important.
What advice would you give district looking into going 1:1?
At Katie's district, they have had various other districts visit during the day to see the iPads in action. Teachers ask questions of students and teachers as well as administrators. So, Katie says, do your homework. She states found out how many money it takes to not only start-up the 1:1, but also how much money it takes to maintain the environment. Think about how you will provide teachers with professional development opportunities that increase use of the device is another thought Katie had. Lastly, make sure that not only students, but parents, are also on board. Without their agreement there will be lots of uphill battles, she explains.
Sunday, February 5, 2017
(u03a2) Discovering Something New
Seesaw
Richard Byrne and Kathy Schrock is my go-to people when I'm looking for new ideas or if a teacher has come to me with a need but I'm unable to come up with a solution on my own. I decided to dig into SeeSaw, as I presented Kidblog to my teachers a few months ago, but they would rather have a site that is free. This assignment provided me the time to see what features SeeSaw provides students and teachers.
Pros:
1. As soon as you log in, you can see a feed of recent activity.




Richard Byrne and Kathy Schrock is my go-to people when I'm looking for new ideas or if a teacher has come to me with a need but I'm unable to come up with a solution on my own. I decided to dig into SeeSaw, as I presented Kidblog to my teachers a few months ago, but they would rather have a site that is free. This assignment provided me the time to see what features SeeSaw provides students and teachers.
Pros:
1. As soon as you log in, you can see a feed of recent activity.

2. You can share a SeeSaw link with parents and they will only be able to see their student's work.
3. Students can log in using a QR code or class code.
4. The website can be password protected so student work isn't available for anyone on the internet to see.

5. When a teacher posts a note to the news feed, she can also record her voice. This would be great for the lower readers I have in my third grade classes

6. Everything posted from the students will have to be approved by the teacher first.
7. Seesaw can be accessed on any device, allowing me to use iPads if the laptop cart is checked out.
8. There are various items you can post; videos, pictures, notes and even a drawing!
9. The site contains is a built-in grade book to easily keep track of student scores.
Cons:
1. To post to the blog, you first have to publish to the news feed, then click a button on the bottom of your post which says "Publish this item to the blog". It took me a while to figure this out. This is due to SeeSaw being a digital portfolio platform first and foremost.
2. The site seemed a little glitchy when I was using it. It seemed to not stay at one size.
3. Everything the student posts needs to be approved by the teacher.
Overall Experience:
It is a terrific platform for housing a digital portfolio, just a little tricky when trying to utilize the blog page. The interface is very children friendly, with few buttons to confuse young learners. Everything is posted onto the news feed, which a student can scroll through. This would help keep frustrations on knowing where to look for instructions. The teacher and student platform is user friendly and with a straightforward layout.
Draw and Tell
For my next choice from Richard Byrne's directory I decided to try out an iPad app. I've been looking to spice up my unit on David Shannon and am hoping to find an app that students can use after listening to one of David Shannon's funny stories. I was immediately excited to see it was another Duck, Duck, Moose creation as I already love their ChatterPix app! I was also pleasantly surprised to see the app was made in conjunction with Khan Academy.
Pros:
1. There are only 3 options available when you open the app - blank paper, coloring and view your drawings. Not only are there only 3 choices, but each is a different color. This will aid my students in knowing which to pick just by me telling them the color. Lastly, the app will speak to the child telling them of their options as well.

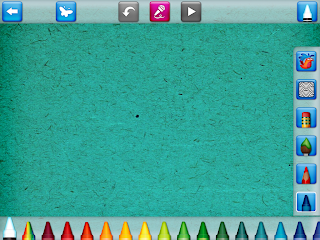
2. After choosing a paper, students have the opportunity to not only draw and put in stickers, but also record their voice.
3. The choosing of colors, stickers, and utensils is very straightforward. There is no clicking between screens - everything is laid out for the student. To maximize space, there are options on the bottom and top as well as the side. This actually doesn't get confusing because the placement of the items makes sense.

4. The app has many stickers, including numbers, letters, animals, and shapes. When retelling the story, it will be nice for students to have options. During the recording phase, the stickers can be moved to enhance the retelling.
Cons:
1. Music is consistently being played in the background. Even though it's soft music and from classic nursery rhymes, it can get a little nosy with 20+ iPads. Thankfully, there is an option to turn off the music with just one click, but this will take time.
2. I had a hard time figuring out there were stencils. I of course didn't take the time to read that it said "stencil" but I also know my students would not have read the word either. It is good to have a stencil option, it will just be something extra I will need to explain.
Overall Experience:
It's a robust app for lower elementary students for retelling a story, creating a new part of an old story, or for designing their own page of a book. It's simple to navigate and easy to show how to create a page. I also think my students will enjoy the coloring pages for when there is down time while we wait for everyone to finish their work.
uJam
When my students complete a project about online safety, one of the options is to use an online tool that creates beats to record a poem about staying safe online. I decided to test out uJam to see if this could also be employed for this project.
Pros:
1. Easy to create an account.
2. What you have created cannot only be saved on the website, but also in Google Drive.
3. Students do not need a lot of musical background to turn their ideas into music. The site does a lot of the work for the student.
4. There are lots of options available, but none seem to have an overwhelming amount.

5. You can speak directly into the mic or upload a file that you've already created.
6. If you are really musically talented, you can change chords and and melody.
Cons:
1. You must be 13 or older or have parent permission to use the website.
2. To add space to your uJam account, you must complete certain steps.

3. When I went to replay my song after saving it to my account, I was unable to hear it. Not sure what I was doing wrong.
4. There are no teacher controls over student accounts and no way to control what songs students can access from other users. I'm concerned about lyrics on other songs.
Overall Experience:
A fantastic choice for adding music to the classroom at the middle and high school level. The user doesn't need a lot of music background to create a song that relates to education. It is fairly user friendly, but would be confusing for elementary students without a lot of walk-through guidance before hand.
Saturday, February 4, 2017
Fill Up Your Toolbox
URL Shortening
Using URL shortening comes in very handy with students. With my elementary students, I typically post a link to my Symbaloo since it's very colorful with pictures. I can say something like, "click on the pick button" and they will know where to find the link. When I taught high school I used url shorteners more often because I would email or post a link on my website for my students. At conferences, when sharing a link to something I created, url shorteners come in handy as well. I created a url using bit.ly and tinyurl.com for this assignment. When I use shorteners, I gravitate toward goo.gl so I decided to try two others. Both are easy and fast. Bitly has a great options for creating an account and enabling the user to track how their links are being used. If I was a professional wanting to expand my brand, this would provide me with amazing information.
Bookmarklets
It's interesting we are writing about bookmarklets because a friend just sent me a new one that I thought would eventually be useful. The bookmarklet that was sent to me is called CraftyText. It puts a big text box on the front of your webpage so you can type right on top of the website. For me, this will be beneficial when wanting to write down a few short steps for my students to reference when working on a website. Of the options from the list, I chose prinliminator. When printing off websites, I always find it annoying to see all the extra stuff on the bottom and top of the website. For example, I don't always need the website address and date I accessed it. This bookmarklet is good for when students print off information during research as there is often wasted paper. I can see teaching my 4th and 5th graders how to use the bookmarklet to save on paper. Personally, I do not print often anymore, but when I do, I hate wasting paper.
QR Codes
There are many uses for QR codes in the classroom. I've always wanted to create QR codes that link to a book review created by my students. During check out, students could walk around with an iPad and scan a QR code that is on the front cover of a book. This would then take them to a recording or video of a student giving a book review. However, this idea has yet come to fruition. Currently, I have my 2nd and 3rd graders using QR codes to investigate the nonfiction section of the library. As a team, they walk around the nonfiction section and scan QR codes they see. The QR codes takes them to the description of which section they are currently standing in.


At the high school level, I had students create QR codes that were placed outside of classrooms. When new students came to tour our school, they would then scan the QR code outside of the classroom, which then took them to a video about that class. In the video, students explained what class was in that room and typically interviewed the teacher of that class as well. A few years ago I used QR codes at the middle school level in a health unit utilizing what my students learned on Heart Healthy Day. We created yoga poses and posted QR codes that linked to videos of how to do the poses. A handout with the QR code was placed around the school. Here are the instructions I posted on my old website. I like to use http://qrcode.kaywa.com/ to create QR codes because there is no sign up needed.
For this project I created a QR code to be placed in our bathroom for use by my two young boys. They have a hard time brushing their teeth for a sufficient amount of time. I am going to place the QR code in our bathroom so that when it's time to brush teeth, my boys can listen and song along to the song to ensure they have brushed long enough.


Using URL shortening comes in very handy with students. With my elementary students, I typically post a link to my Symbaloo since it's very colorful with pictures. I can say something like, "click on the pick button" and they will know where to find the link. When I taught high school I used url shorteners more often because I would email or post a link on my website for my students. At conferences, when sharing a link to something I created, url shorteners come in handy as well. I created a url using bit.ly and tinyurl.com for this assignment. When I use shorteners, I gravitate toward goo.gl so I decided to try two others. Both are easy and fast. Bitly has a great options for creating an account and enabling the user to track how their links are being used. If I was a professional wanting to expand my brand, this would provide me with amazing information.
Bookmarklets
It's interesting we are writing about bookmarklets because a friend just sent me a new one that I thought would eventually be useful. The bookmarklet that was sent to me is called CraftyText. It puts a big text box on the front of your webpage so you can type right on top of the website. For me, this will be beneficial when wanting to write down a few short steps for my students to reference when working on a website. Of the options from the list, I chose prinliminator. When printing off websites, I always find it annoying to see all the extra stuff on the bottom and top of the website. For example, I don't always need the website address and date I accessed it. This bookmarklet is good for when students print off information during research as there is often wasted paper. I can see teaching my 4th and 5th graders how to use the bookmarklet to save on paper. Personally, I do not print often anymore, but when I do, I hate wasting paper.
QR Codes
There are many uses for QR codes in the classroom. I've always wanted to create QR codes that link to a book review created by my students. During check out, students could walk around with an iPad and scan a QR code that is on the front cover of a book. This would then take them to a recording or video of a student giving a book review. However, this idea has yet come to fruition. Currently, I have my 2nd and 3rd graders using QR codes to investigate the nonfiction section of the library. As a team, they walk around the nonfiction section and scan QR codes they see. The QR codes takes them to the description of which section they are currently standing in.


At the high school level, I had students create QR codes that were placed outside of classrooms. When new students came to tour our school, they would then scan the QR code outside of the classroom, which then took them to a video about that class. In the video, students explained what class was in that room and typically interviewed the teacher of that class as well. A few years ago I used QR codes at the middle school level in a health unit utilizing what my students learned on Heart Healthy Day. We created yoga poses and posted QR codes that linked to videos of how to do the poses. A handout with the QR code was placed around the school. Here are the instructions I posted on my old website. I like to use http://qrcode.kaywa.com/ to create QR codes because there is no sign up needed.
For this project I created a QR code to be placed in our bathroom for use by my two young boys. They have a hard time brushing their teeth for a sufficient amount of time. I am going to place the QR code in our bathroom so that when it's time to brush teeth, my boys can listen and song along to the song to ensure they have brushed long enough.
Sunday, January 29, 2017
Dig Deeper into the Mainstays (u02a2)
When I was looking into this blog post assignment, I was excited to see there were a few websites in the 3 categories that I had not had the opportunity to use or haven't used in a very long time. Finding time to look through new tools is hard, but important.
Social - Edmodo
From the first category, Social, I already widely use Twitter for my own PLN but not for student learning. Since I teach K-5 students, I don't feel Facebook is an appropriate route to take since you must be 13 or older to use Facebook. Eight years ago I utilized Edmodo in my middle school language arts class, but I haven't since. This is a good opportunity for me to re-evaluate Edmodo, see what is new, and determine if it would be beneficial to my students.
The first thing that jumps out at me when on Edmodo is how much it looks and feels like Facebook. This is a positive thing, I believe, because social media is prominent in the lives of my upper elementary students, thus giving them a feeling they are using a social media website. Everything being in one place is of importance as well. I can easily post an assignment, quiz, or a note right from the first screen. This also pops up in chronological order on student's accounts, which helps them stay organized. When assigning, I can also attach a link, file, or bring something up from my Library of items. Having these options are great because it gives me various options for assignments. Another great aspect of Edmodo is the creation of groups. I can assign different work to different groups and groups can converse with each other on the platform without others interfering.
While I was researching how other teachers engage students with Edmodo, I came across an idea from Jennifer Lewis, a high school teacher. She pointed out that with Edmodo, you can add apps to your student's accounts. For example, students can access Office365 or NoRedInk app without ever having to log into another account. This is a great way to app smash without students having to remember various account information or website/app names. Another great idea Jennifer Lewis had was to use Edmodo for literature circle groups. Though I don't teach lit circles anymore since my role is now technology integrationist, I could see how Edmodo would be a terrific platform for sharing lit circle information related to student roles.
In general, the social category can enhance student learning because it can be utilized as a way for students to share information, ideas, and check each other's progress. Having work posted on a social platform is a great way to initiate collaboration between team members and have a place to post work for others to view and comment. Online etiquette and online safety can be part of the learning taking place when on social websites.
Creative - WeVideo
Since I already have experience with VoiceThread and Prezi, I evaluated WeVideo. Though I've watched videos that have been posted on WeVideo, I've never had the chance to dive into all that WeVideo is capable of until today. When reading the first page on the login screen, I noticed all videos are housed online in the cloud. This immediately got me thinking about how wonderful it will be not to have to worry about which computer a project is saved on. What also stood out to me is that WeVideo can be used on my iPad as well, giving me more options for video recording then just using a video camera.
Unfortunately I found two downfalls right away. The first being I had to really dig to find a place to sign up for a free account. With how robust the editing software is, I can see how beneficial it would be to have a paid account, however, I just wanted to test-drive the site. The second downfalls was in the user agreement. I found that WeVideo is intended for students over the age of 13, at least in the free version. If I wanted to use a paid version specifically for school, I would have to see if the user agreement is different for those accounts.
Like many editing software available, it has drag and drop that allows the user to move around various pieces. I also like how the menus at the top use pictures instead of words, this is helpful for my low readers or ELL students. Being able to video record straight from the web browser aids in cutting down confusion from having to go from a website to the desktop. Lastly, even though there are various options for enhancing a video, such as transitions and music, it does not cause the user to get "lost" in that is available. For instance, there are a limited number of transitions and themes, allowing the student to have creativity without loosing the goal of the project.
The creative category can really enhance and engage students in the learning process. When utilizing any creative software, students are in the trenches of learning because they are put in the driver seat instead of the teacher. Students are the ones coming up with ideas of how to showcase their learning and understanding. The depth of knowledge can also be deeper because of having to apply their knowledge and synthesize it into their project.
As I was researching how teachers use WeVideo in the classroom, it seemed many were using it as a way to explain a process. One example that I found interesting included students explaining how to perform a skill in gym class. The gymnasium can be one place where it is hard to incorporate technology into student learning, but this is a great example of doing just that. I do believe students will remember the skill as well as be able to apply the skill after creating their video. Also, other students may learn better from a peer then from an adult.
Curation - BlendSpace
Since I already extensively use Symbaloo for school and Pintrest for personal use,I decided to try out Blendspace instead. I've already created content in EduClipper for another class. Though I've not yet used Blendspace in my own classroom, I just researched and presented about Blendspace for a technology conference and thus I'm applying what I learned to this blog post.
One of the fantastic features of Blendspace is that it is all drag and drop. For my younger students, there is no worrying about copy and pasting. The second great feature is that all that you need to build your Blendspace is found right beside the work space. If a student wants to add a video, quiz, or information, you can search sources such as Google, YouTube, Google Drive, and the computer straight from the same space where the item will be dropped. There is no flip-floping between screens, websites, or devices. Students will have less of a chance getting lost in the creation process.
Unlike some of the other curation sites, you can create a quiz in Blendspace, instead of needing another website, copying the link, and pasting it in. Also, unlike other curation websites, all of the content is house within Blendspace. So, instead of clicking on a link and it opening another browser or tab, all the content stays on the Blendspace website. I can also shuffle through each resource by using an arrow instead of needing to go back to the original work space. Lastly, there are 198 ways to share one's work on Blendspace, making it easier for students to compile a digital profile.
Curation websites in general are exceptional at providing a place to put work. For example, Blendspace provides a place for a user to place their information during research. It does little to offer any creativity with the content, but does provide a great starting point for finding out more information about a particular topic. Curation websites can also give students a place to collaborate on projects, especially if all students are researching at the same time. When utilizing a curation website, a teacher could easily tie in how to find reputable websites and how to analyze information before using it.
Friday, January 27, 2017
Using New Technologies u02a1
I interviewed another teacher, Sandy, who lives in a different area of Iowa. I choose this teacher because she not only has years of experience in the classroom, but is constantly integrating web 2.0 technology tools. When on the phone, she decided to discuss the website www.storybird.com with me. Coincidentally, this is a tool we both utilize in our classrooms.
Recommendations from other teachers is one starting place for Sandy when looking for a tool to use in her Gift and Talented and/or English as a Second Language students. Sandy stated that when she chooses a web 2.0 tool, the first thing she does is filter it through the Iowa Core. She determines if it aligns with the standards for the grade in which she is working with. If it does, then she bases her decision on student interest as well as ease of use for educators.
Fortunately for Sandy, she does not typically need special permission from administration to implement new tools. Using her own good judgement and checking the user agreements for age of use is how she avoids obstacles with technology tools. For example, Storybird is geared towards educators and students, the user agreements allows for children 13 and under to operate it, and she tested the website before presenting it to her class.
Sandy has a few pieces of advice for other teachers looking to incorporate Storybird into their projects. Focusing on the writing or editing process is the best use of Storybird. The explicit instruction model works extremely well when introducing this tool to upper elementary or middle school students. For example, first, Sandy shows the class how to operate the website in a whole-class setting. Then, together, the class makes a trial story together employing the information they learned from the previous step. Together, students walk through each step of the story making process on the website. Now, students have the ability and confidence to create their own story on their own. During the last phase of explicit teaching, Sandy explains how her students can self and peer edit their pieces of work.
One last piece of advice Sandy gives is Storybird is a great tool for differentiating instruction because students have the ability to work at their own level. Each student has a differing writing ability and can be fairly graded on their individual abilities when employing this web 2.0 tool. Teachers can easily scaffold each student at their level. For example, when writing a story, some students are able to include a beginning, middle and end, while others have mastered this skill and can move on to including dialogue. Here are a few examples of Sandy's student's work.
I agree wholeheartedly in all that Sandy stated. I find it extremely important to check the user agreements before implementing any new tool. The safety and security of my students is a top priority. I also recognize testing the tool for alignment with standards is also important. It is good to have students using technology tools, but there should always be a purpose. One additional way I determine the validity of a tool is thinking about where it falls on the SAMR scale. If I am going to use a tool with my students, I want to ensure I'm using it with the goals for my students and an end in mind.
Recommendations from other teachers is one starting place for Sandy when looking for a tool to use in her Gift and Talented and/or English as a Second Language students. Sandy stated that when she chooses a web 2.0 tool, the first thing she does is filter it through the Iowa Core. She determines if it aligns with the standards for the grade in which she is working with. If it does, then she bases her decision on student interest as well as ease of use for educators.
Fortunately for Sandy, she does not typically need special permission from administration to implement new tools. Using her own good judgement and checking the user agreements for age of use is how she avoids obstacles with technology tools. For example, Storybird is geared towards educators and students, the user agreements allows for children 13 and under to operate it, and she tested the website before presenting it to her class.
Sandy has a few pieces of advice for other teachers looking to incorporate Storybird into their projects. Focusing on the writing or editing process is the best use of Storybird. The explicit instruction model works extremely well when introducing this tool to upper elementary or middle school students. For example, first, Sandy shows the class how to operate the website in a whole-class setting. Then, together, the class makes a trial story together employing the information they learned from the previous step. Together, students walk through each step of the story making process on the website. Now, students have the ability and confidence to create their own story on their own. During the last phase of explicit teaching, Sandy explains how her students can self and peer edit their pieces of work.
One last piece of advice Sandy gives is Storybird is a great tool for differentiating instruction because students have the ability to work at their own level. Each student has a differing writing ability and can be fairly graded on their individual abilities when employing this web 2.0 tool. Teachers can easily scaffold each student at their level. For example, when writing a story, some students are able to include a beginning, middle and end, while others have mastered this skill and can move on to including dialogue. Here are a few examples of Sandy's student's work.
I agree wholeheartedly in all that Sandy stated. I find it extremely important to check the user agreements before implementing any new tool. The safety and security of my students is a top priority. I also recognize testing the tool for alignment with standards is also important. It is good to have students using technology tools, but there should always be a purpose. One additional way I determine the validity of a tool is thinking about where it falls on the SAMR scale. If I am going to use a tool with my students, I want to ensure I'm using it with the goals for my students and an end in mind.
Friday, January 20, 2017
Creative Commons

This work is licensed under a Creative Commons Attribution-NonCommercial-ShareAlike 4.0 International License.
I created a license for my blog and chose the Attribution Non-commercial Share Alike (by-nc-sa) license. Per the website wiki.creativecommons.org, this license allows others to download my material, make changes, but also give me credit. In addition, users cannot use my information for commercial purposes. I chose this license because I understand the importance of allowing others to build off people's ideas. If we don't allow others to access our ideas and suggestions, it is hard to make creative growth. When I started teaching, there was very little on the internet regarding awesome lessons and project ideas. I typically had to buy a book that provided me with new ideas. Today, we have access to a tremendous amount of ideas because teachers are willing to share. Twitter is a wonderful example, I have a constant stream of new ideas and thoughts coming my way every day. If I'm struggling, I can post a question and in minutes have suggestions or answers. This license aids me in continuing this process.
However, though I believe it is important for others to take my ideas and thoughts and use them in positive ways, I do not want others making money from it in a commercial sense. There is a lot to be said about the free flow of ideas and for others to make money off what other people think, I believe, would start to cripple the great sense of sharing that our country has right now.
Licensing Portal for Educators. (n.d.). Retrieved January 20, 2017, from https://wiki.creativecommons.org/wiki/Licensing_Portal_for_Educators
Subscribe to:
Posts (Atom)